
 |
| About Us | News | Videos | Syllabus | Articles | Directions | Links |
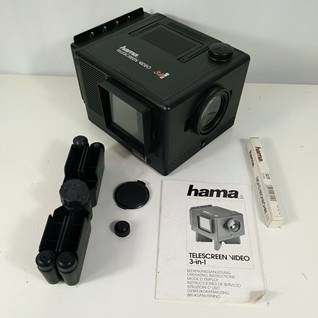
| How to Convert Cine Film to Digital Written by Gisela, Director at Supaphoto The Magic of Old Cine Film Typical Issues You Will Face The bigger issue which people always remember is where your film is burnt when stationary by the bulb behind the gate. This is very common and older users of cine film will be more than aware of that familiar burning smell. These old cine projectors used bulbs that were much hotter than modern day LED bulbs. Often you’ll get a burn hole. A burn hole is not what you need on your film! It means simply that at some point whilst viewing your treasured old family films, you might inadvertently stop the film from rolling through and the film will stay stationary in the gate for too long. Heat from the light source will eventually burn a hole right through the film. If your films have these holes then, you'll probably see an odd sight quickly pass by when viewing your transfer. It will be a super bright white spot if the film was burned all the way through as well or it may appear darker and bubbly - this is where film's emulsion nearly gets burnt and becomes crispy. Another super common issue is the case of sprocket holes that have been damaged. Film perforations, additionally known as perfs and sprocket holes, are the holes placed in the film during manufacture. They are used for transporting (by sprockets and claws) and steadying (by pin registration) the film which passes the gate where the light shines through to project the image via a lens. Films had different types of perforations depending on film gauge, film format, and intended usage. Standard 8 film used 16 mm film that was perforated twice as much (half the pitch of normal 16 mm) and then was cut down the middle after development. Super 8 used much narrower perforations on film which is already 8 mm wide. Often, damaged or broken perforations could also lead to a tear in the film as it runs through your projector. For afficionados, film would have been ideally checked for broken sprocket holes before presentation, a process known as "spooling". The classic method would have been to place a finger and thumb of a gloved hand on the edges of the film, which would be mounted on a film rewinder. You’d then slowly run the film through the fingers, feeling for snag. When the film was played and the these sprocket holes were damaged (by say poor splices leading to the sprocket holes no longer being equidistant to each other), the film would start to jerk, running the risk of even more damage. Another very common instance is where poor splices (pieces of typically sticky plastic tape that connect segments of film together) break and result in a halt in the viewing of your film. It was also very common in the past for people to apply a thin bond of film cement to splice film together. Film cement is in fact a special glue designed to join cine film. It is made of film base dissolved in a solvent. Cut sections of film would be sliced together in a film splicer using film cement. It was best that the emulsion of the film would be scraped off prior to applying the cement or the splice will fail. Film cement also had a workable life span which means that if the amount of solvent fell below a certain level, the splices would fail. The problem also came when the cement applied was too thick and the film would get stuck as it was passing through the projector. First Option: The DIY Cine Film Conversion Option Yes, good question. A very basic way with not fantastic but acceptable results for many is simply to project your film against a wall and try to record it with either a camcorder or a mobile phone. Firstly, match your film type to the projector. i.e standard 8 film will require a standard 8 projector. Getting this wrong will wreck your film since the sprocket drivers won’t match the film's sprocket holes. Secondly, trust your projector not damage the film in the first place - easier said than done. The first step would be to set up your projector so that it is facing a wall and then secure a white board to the wall. It will look less natural but you can also use a grey board, as opposed to a white board if you prefer since the latter would reflect too much light and potentially create blown out areas in your camera (Known as hotspots). Next you’d need to set up your digital camera or your phone for recording. Best choose one where you can accurately adjust the frame rate since cine film will have been recorded at different frame rates to what we are used to today. Frame rates (normally expressed in frames per second or FPS) is the frequency (rate) at which consecutive images are either captured or displayed. Depending on the camera, this may not always be possible. You’ll also have to adjust your camera’s manual focus if necessary. Carefully then thread your film into your projector and make sure you have an empty take up reel ready. Next, turn on your projector, being super careful not to accidentally ‘freeze’ the film in the gate, as the heat from the old projector lamps can easily burn through the film in seconds. Next just adjust the lens if necessary, so that a clear image plays on the board. Finally, it will be time to turn off the lights and hit the record on your digital camera. Once complete you can then send it to say a laptop and edit it. It typically won’t look amazing and would be quite fiddly to set up but it will do the job hopefully as long as you don’t damage the film in the process. Some of the issues you’ll generally face is the risk to the film itself, non contrasty areas often revealing the board you are projecting on, overall sharpness and evenness and the annoying fact that you’ll have to do all of this in the dark! In the same category you could also consider a telescreen system.Operating the telescreen is very simple: open the mirror at a 45 ° angle to the screen and aim the projector at the mirror. The image is projected onto the screen via the mirror and can simply be filmed. It’s ok but you’ve get average quality.
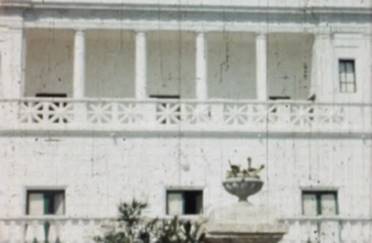
Second Option: Purchasing a Domestic Film to Digital Converter Check too that the conversion format of the digital converter. A lot of cheap scanners will only convert your videos to JPEG format which is just an image sequence that needs to be stitched together. It is not a video format such as MP4. Also the resolution tends to be very poor. On the plus side, the results of film to digital converters is such that they can be carried out in a lit room without the need to be quiet. The results should be a little better than filming off a wall and there’s generally less risk of damaging the film. The downside is that they are quite pricey and the quality is not as good as a professional transfer service (but again check this because lots of so-called professional services offer substard transfers with low grade equipment in reality). The sharpness and definition will be quite poor generally. It also tends to be very slow indeed and jolly time consuming! Lastly, these machines can’t generally handle film that has very dark patches very well. Last Option: Choosing A Professional Cine Film Transfer Service The simple solution is to employ the services of a professional cine film transfer service. This will generally serve to get you results you deserve. You won’t need to spend any money on complex digital converter technology or waste time fumbling around a dark room trying to make your DIY solution work. Preparation There are huge differences that you should be aware of before you choose a telecine partner though. May have early type cine cine machines that did not output frame by frame images. Frame by frame scanning, as the name suggests, means that each single frame of film is scanned. These scans would then be compiled into a video file and played back to make a video. This type of capture is better. Even then there are other considerations. One might be the optical quality of the lens for example, the evenness of the scan (it’s vital that the whole picture is sharp and there are no blurry bits on the edges. It’s also important to choose a film scanner with a full dynamic range. This reduces noise and increases details in the shadow areas. Sound Resolution Dealing with Scratches It’s not uncommon for old film to have many scratches and this technique can do an amazing job in cleaning most films up. Submerging the film in the gate in a liquid with a suitably matched refractive index will reduce the effect of any scratches on the film. It does this by reducing the refractive effects which divert light that passes through the scratched part of the film. The liquid itself will also act to lift other forms of defects from the film. See a before and after example below.
Output Whatever you chose to do, good luck and happy viewing! Bradford Movie Makers Archive For further information on digital film scanning, check out Supaphoto's website below. Supaphoto also have the facilities to digitize old video tapes, photos, slides and audio tapes. November 2022 |

| Back |